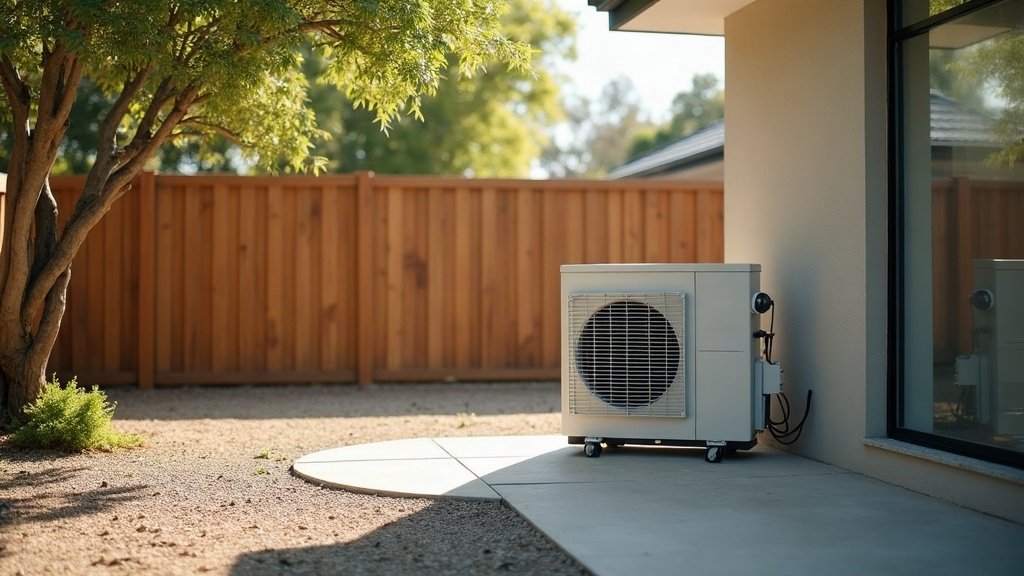

The indoor head unit gets all the attention when people plan an aircon install. The outdoor condenser gets whatever spot is left over, usually the side alley nobody looks at. That’s a mistake. Where that box sits affects how hard it works, how long it lasts, and whether your neighbour ends up knocking on your door about the noise.
Good siting isn’t complicated, but it does need thinking through before the bracket goes on the wall, not after.
Why the spot you pick actually matters
The outdoor unit is doing the heavy lifting: it’s where the compressor sits and where heat gets dumped outside (or pulled in, when the system’s running in heating mode). Cramp it into a tight corner with no airflow and it has to work harder to move the same amount of heat, which means higher running costs and more wear on the compressor over the system’s life.
It’s also the part of the system your neighbours actually notice. A unit that’s well sited barely registers. One that’s badly sited, boxed in against a shared fence or bouncing noise off a brick wall, can turn into an ongoing argument that a bit of upfront planning would have avoided entirely.
Give it room to breathe
Outdoor condensers need open air on the sides and above to draw air in and push it back out again. Box it in tight on multiple sides, whether that’s a fence, a wall, or a pile of stored junk, and airflow gets choked. The unit then recirculates its own hot exhaust, which is exactly the wrong direction for efficiency.
The exact clearance figures differ by brand and model, so this isn’t a number to guess at: check the installer’s manual for that specific unit, and your electrician and refrigerant technician will factor it into the install. As a rule of thumb, more open space around the unit is always better than less, and a spot with airflow on at least two sides beats a tight, enclosed nook every time.
Sun and shade: a hot box works harder
A condenser baking in full afternoon sun all day isn’t going to fail, but it will run less efficiently than the same unit sitting somewhere shaded or only getting morning sun. The unit is already trying to shed heat outside; starting from a hotter ambient temperature just makes that job harder.
You don’t need to build a shade structure over it. A spot under an eave, on the shaded side of the house, or with a tree or fence casting afternoon shade is usually enough. Just don’t box the unit in to get that shade: airflow always comes first, shade is the bonus.
Drainage and what’s underneath it
Condensers produce condensate, and depending on the model and mode, that can mean water dripping or draining near the base of the unit over time. A patch of bare dirt under the unit turns into a permanent mud patch. Gravel, pavers, or a proper drainage point underneath solves that before it becomes a problem.
Ground-mounted units also need a stable, level base, not soil that shifts or turns soft when it rains. A wall-mounted bracket needs to be fixed into something solid enough to carry the unit’s weight without vibrating loose over time.
Noise and being a decent neighbour
Every outdoor condenser makes some noise: it’s a mechanical unit with a fan and compressor. The question is where that noise ends up. Mount it hard against a shared boundary fence, especially in a gap between two brick walls where sound bounces around, and you’ve built a noise amplifier pointed straight at next door.
Distance from bedroom windows, both yours and the neighbour’s, is worth thinking about too. If you’re in a strata property or a unit block, check your body corporate or strata rules before the install: some have specific requirements about where outdoor units can go and how they need to be mounted. Local council noise rules can also apply in some areas, so it’s worth a quick check if you’re placing the unit close to a boundary.
The mistakes that keep coming up
- Wedged into a tight side alley: airflow chokes on both sides and the unit recirculates its own hot exhaust.
- Sitting on bare dirt with no drainage: condensate turns the ground underneath into permanent mud.
- Mounted hard against a shared fence: noise bounces straight into the neighbour’s yard.
- Full sun all day with no shade option nearby: the unit starts every cycle already fighting a hotter environment.
- Decided on the day of install instead of planned in advance: the installer ends up working with whatever’s easiest, not what’s actually best.
None of these are hard to avoid if the spot gets picked with airflow, drainage and boundaries in mind before the day the unit turns up.
Get it signed off before it’s bolted down
Siting is one of those things that’s easy to change on paper and a genuine hassle to change once the unit is mounted, wired and connected. Walk the site with your installer beforehand, point out the fence lines, the bedroom windows either side, and where water already tends to pool in your yard.
Connecting a split or ducted system, running the refrigerant lines and wiring the outdoor unit in, is licensed work in Australia: the electrical side needs a licensed electrician, and any refrigerant handling needs an ARC-licensed technician. That’s exactly why the siting conversation is worth having with them directly, before they commit to a bracket position. They’ve seen which spots cause callbacks and complaints, and getting it right the first time beats moving a mounted unit later.
For the bigger picture on how the whole system works together, from choosing a type to keeping it running efficiently, see our Australian home air conditioning guide.